May 7, 2020
4 min read
With many of us currently in quarantine, our cameras have become essential tools that let us connect with friends, business colleagues, or even mass global audiences. Whether you're using a webcam to chat with friends on Zoom, or broadcasting content via live streaming platforms like YouTube Live, having a capable camera with professional features is essential. Let's face it, a webcam won't make the grade in capturing professional images and sound. You also need a professional camera with good manual control if you want to develop a unique look.
The AG-CX10 4K Compact Handheld Camcorder is a versatile tool for live remote streaming.
The new AG-CX10 4K Compact Handheld Camcorder is an ideal tool for live remote production. With a 25mm wide-angle lens, 24x optical zoom and precision Auto Focus, you can capture a variety of shots. And unlike a DSLR, the CX10 contains professional XLR audio inputs, built-in ND filters and LED light with great connectivity, including built-in Wi-Fi and separate Ethernet connectivity, remote camera operation apps, live-streaming directly to social platforms, available NDI|HX (license required) capability and more.
Panasonic Product Engineer Yusuke Ota (IG: @youski_labs) has produced three short guides in setting up your CX10 for live remote streaming. He covers the HC ROP control app for remote control, streaming live on YouTube Live and using the CX10 as a replacement to your webcam.
1. Using the control app HC ROP app to control your CX10 wirelessly
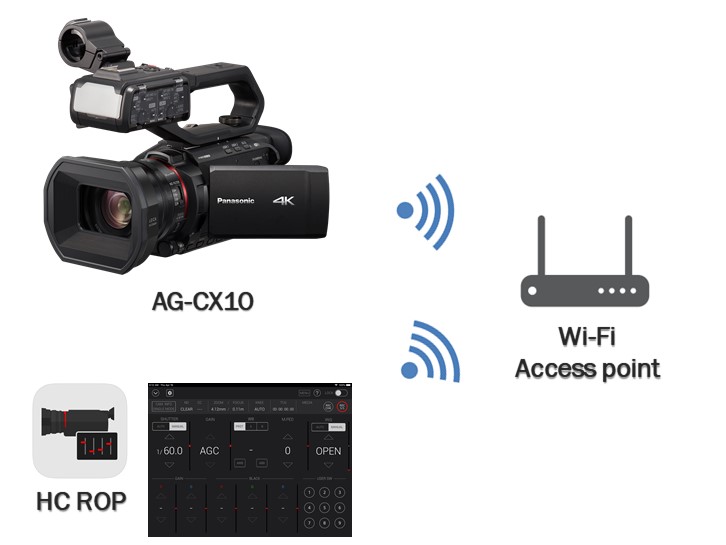
Remote control setup of the CX10 with the HC ROP app
Setup for CX10
- MENU>NETWORK>
- DEVICE SEL>WLAN
- WLAN PROPERTY>TYPE>INFRA(SELECT)
- Select appropriate SSID
- WLAN IPv4 SETTING>DHCP>CLIENT
- IP REMOTE>ENABLE
- Set USER ACCOUNT (Account name & Password)
- Close MENU
Setup for HC ROP
- Tap the gear icon
- Type in IP address which was assigned to CX10 by DHCP (step 5 above)
- Type in User ID & Password that you set for CX10 (step 7 above)
* You should see “R” mark; now HC ROP can control CX10
Download the HC ROP
Follow the setup procedure...
---
2. Using your CX10 to live stream directly to YouTube or Facebook Live.
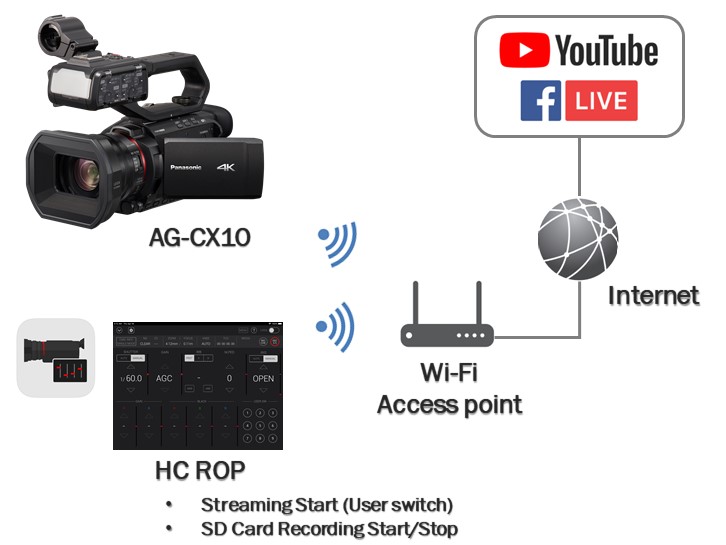
Using the CX10 to stream directly to YouTube Live or Facebook Live.
Stream destination setup
- Prepare a Windows machine and insert an SD card
- Download P2 Network Setting Software
- Open YouTube Studio and copy Stream URL & Stream key
- Open P2 Network Setting Software, and select Streaming & RTMP tabs
- Paste Stream URL, add “/“, then paste Stream key into STREAM DESTINATION URL box
- Tap Export; the URL is stored to the SD card
CX10 Setup
- Setup Wi-Fi connection & HC ROP (see section above)
- MENU>NETWORK>
- NETWORK FUNC>STREAMING
- MENU>NETWORK>STREAMING>
- Select STREAMING FORMAT
- START TRIGGER>CAMERA
- CONNECTION INFO.>SD CARD...RECEIVER URL is copied from the SD card. (step 6 above)
- MENU>CAMERA>USER SW>Assign STREAMING START to a user switch (e.g., USER1)
- Close MENU
Streaming & Internal Rec start
- Open HC ROP and confirm “R” mark shows up
- Tap REC S/S...Internal SD card recording starts
- Tap USER SW1 (step 8 above)
You should see the streaming mark; now CX10 is live streaming to YouTube. The same procedure can be applied to Facebook Live.
Click through here to see live-streamed, internally-recorded, and BTS clips.
Follow the setup procedure...
---
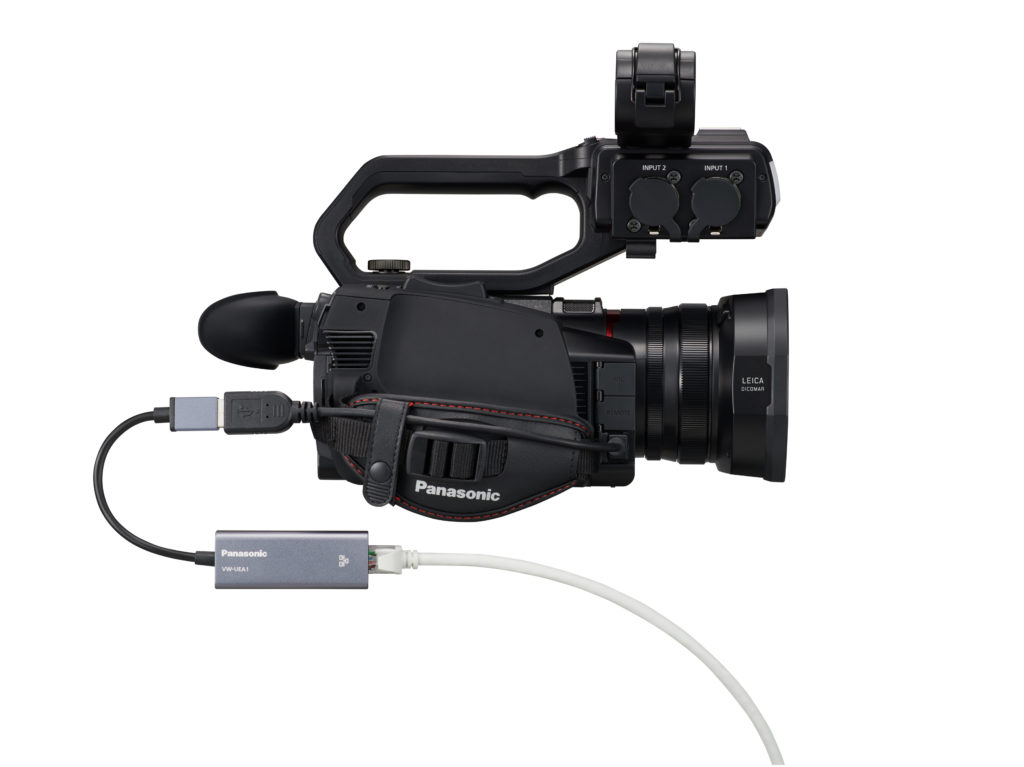
3. Using your CX10 as a webcam
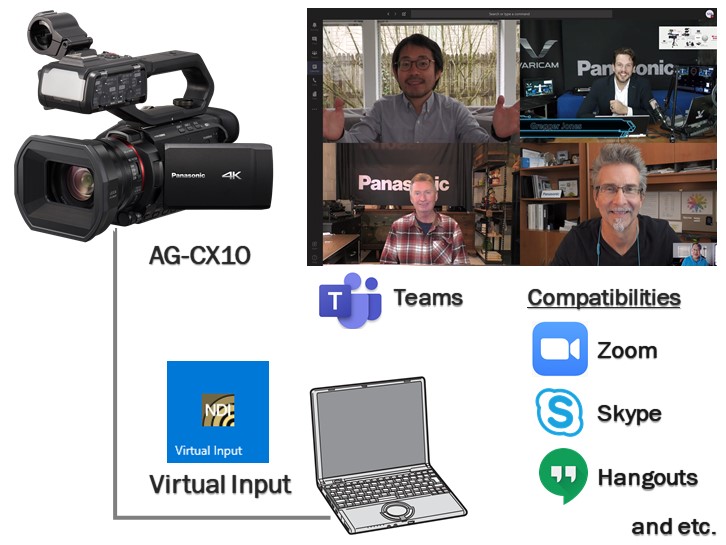
Using the CX10 for meeting apps like Zoom or Microsoft Teams.
Setup for CX10
- Go to NewTek website and download NDI TOOLS 4.5
- Activate NDI|HX on CX10 (*Internet connection and license key are needed for activation)
- MENU>NETWORK (On CX10)
- DEVICE SEL>USB-LAN
- NETWORK FUNC>NDI|HX
- USB-LAN IPv4 SETTING>DHCP>OFF, Set appropriate IP address
- NDI|HX>STREAMING FORMAT>Select a format
- Close MENU
- Connect CX10 to your laptop via LAN cable
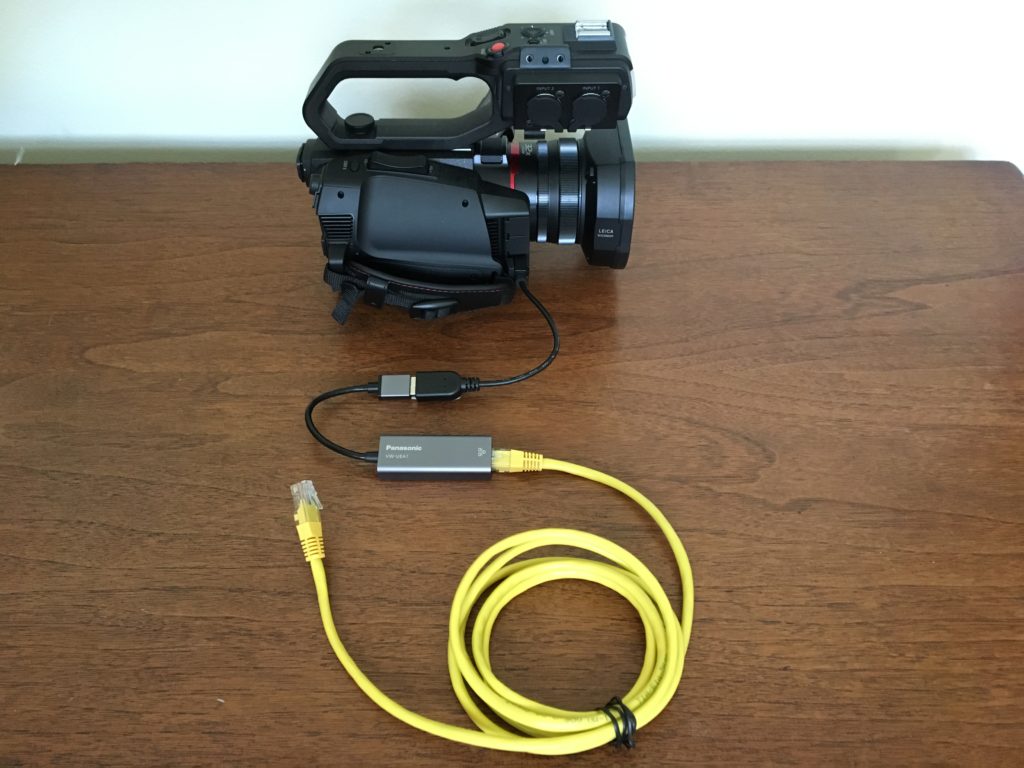
With the supplied VW-UEA1 adaptor cable and NDI Tools Virtual Input (license required), your CX10 can take the place of your webcam.
Setup for laptop
- Turn on NDI Virtual Input
- Right click NDI Virtual Input, then select AG-CX10
- Start a web meeting (e.g. Teams)
* You should see the video from CX10 on the web meeting; now CX10 is your webcam
Follow the setup procedure...
For more information on the AG-CX10, click through here.
![]()
